
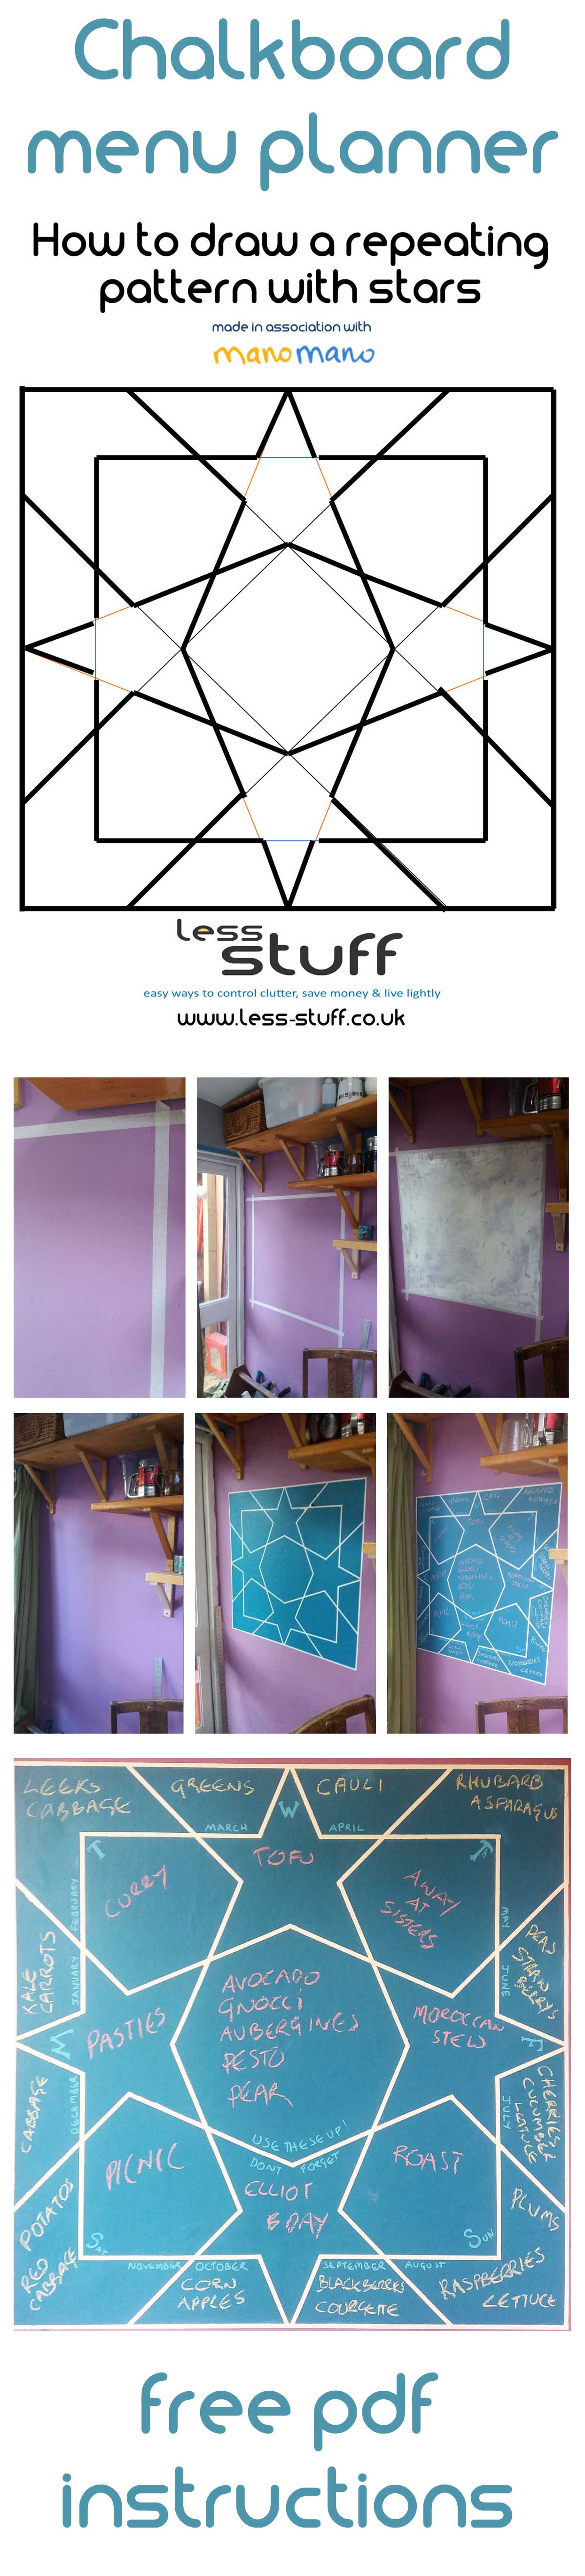
This summer I spent a lot of time scraping off chip paper, replacing it with smooth paper and creating an office space I want to work in. On my office walls I have 2 long strips of chalkboard in an amazing blue colour. I bought a big tin of special chalkboard paint thinking I’d need to use loads of it but I still had lots left. Lovely Mano Mano, where I bought the paint have sponsored this post so I can show you how I made the most incredible menu planning wall.
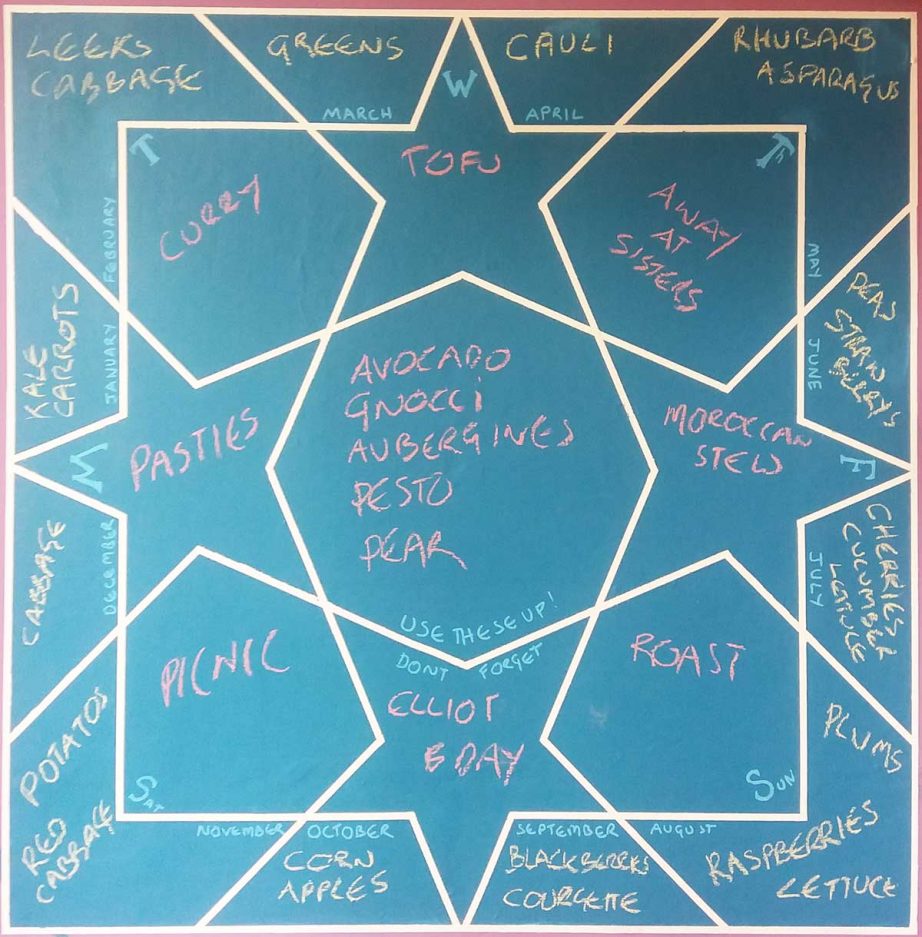
The finished planner
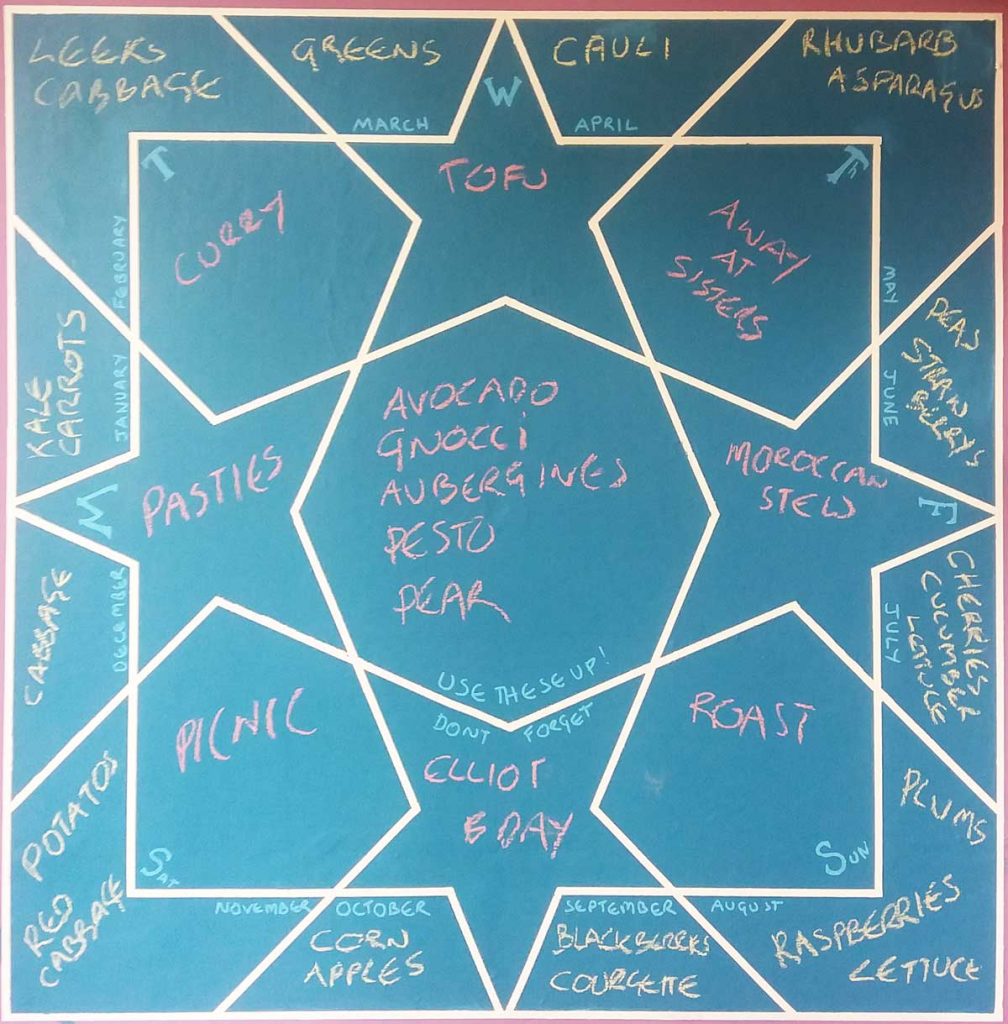
The finished menu planner, it made a difference on the first day!
- On the outside edge are the months of the year, this is so I can write in seasonal vegetables. I can do these in permanent marker and careful writing eventually because they do not change.
- The stars and distorted hexagons have the days of the week. I plan menus loosely on the main item to give me flexibility. There is space to write out full meals if you prefer.
- The bottom star is for things to remember, like Elliots birthday.
- The central area is for a list of things in the fridge that need using up soon. I’ve recently got a new fridge with a huge salad drawer and things are getting forgotten in there.
This isn’t as difficult as it looks!

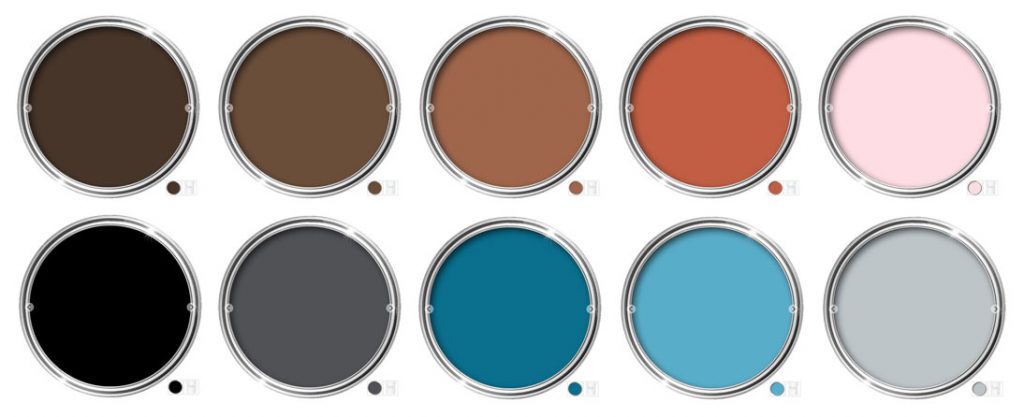
Marina Blue Chalkboard Paint
I used the HQC Chalkboard paint from Mano Mano. It comes in loads of options and my one regret is not getting 2 smaller pots of different colours. This 1l pot is lasting forever! I have done 3 large chalkboards with at least 3 coats of paint on each and I still have over 3/4 of a tin left!
Equipment
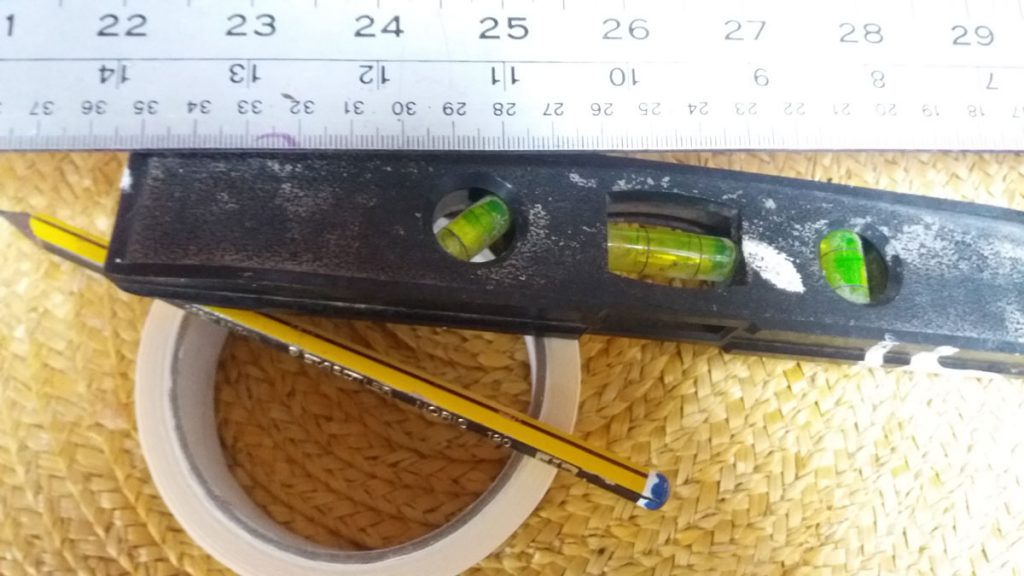
You will need a long ruler, a spirit level, a pencil and masking tape
I used 2 different widths of masking tape, a wide one to tape off the base coat then a narrow one to make the pattern. Mano Mano sell thin masking tape if you need it, I managed to find some in a local craft shop. It needs to be masking tape that is not too sticky, or you will pull the paint off with it. The spirit level is important but in an old house like mine the wobbly walls sometimes look worse with a dead level line so check how it looks no matter what the spirit level says.
A bit later you will also need a scalpel and a paintbrush.
Preparing the wall
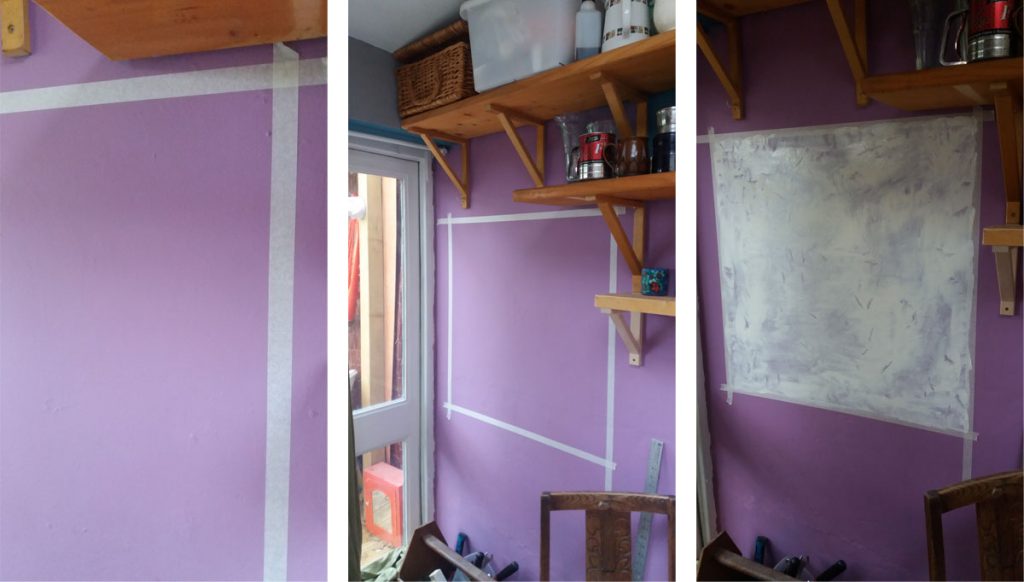
The first stage of the chalkboard wall
If you are painting in a kitchen it is a good idea to wipe the wall first with some sugar soap or strong detergent. Let it dry before you do anything. This will just help the paint stick better.
Start by drawing a line horizontally where you want the top of the chalkboard to go. Decide on a width and measure down the same distance. The planning grid is 10×10 so sticking to a round number will help you with easy maths. My walls are bumpy so it is hard to get a right angle. You can solve this problem by putting the top and bottom lines in first. Use the low tack masking tape so you don’t pull off all your paint when you reposition it and stretch it gently from one end to the other to get a straight line. At this point it is a good idea to give up on perfectionism!
The lines that go from top to bottom had to be re adjusted a few times to get the measurements the same on all 4 sides. You have quite a few tries with masking tape before it loses it’s stick so this isn’t a problem.
I could have painted the chalkboard paint straight onto the wall but I didn’t like the way the lilac and blue clash. I painted the whole square in a white matt paint which took a few coats to cover the purple. The white background will make the blue show up so much better, and I have tiles that are patterns on white so it will tie in the whole design.
If you don’t want to go to the bother of painting a background there are 13 different colours of chalkboard paint ranging from a delicate Rose pink, through Latte and Brown ending up at the more traditional black.
Drawing up the pattern
I fell down the Pinterest rabbit warren to find a pattern for the chalkboard. I was looking for something with at least 8 clear spaces to write in, one for each day of the week and the other for a shopping list. I narrowed it down to this pattern, which I could print off but I couldn’t find any more instructions or measurements for. I spent a lot of the day doodling patterns and trying to work out the ratio but my git face son came home and worked it out first time. Once I gave up on getting the stars perfectly formed life became easier.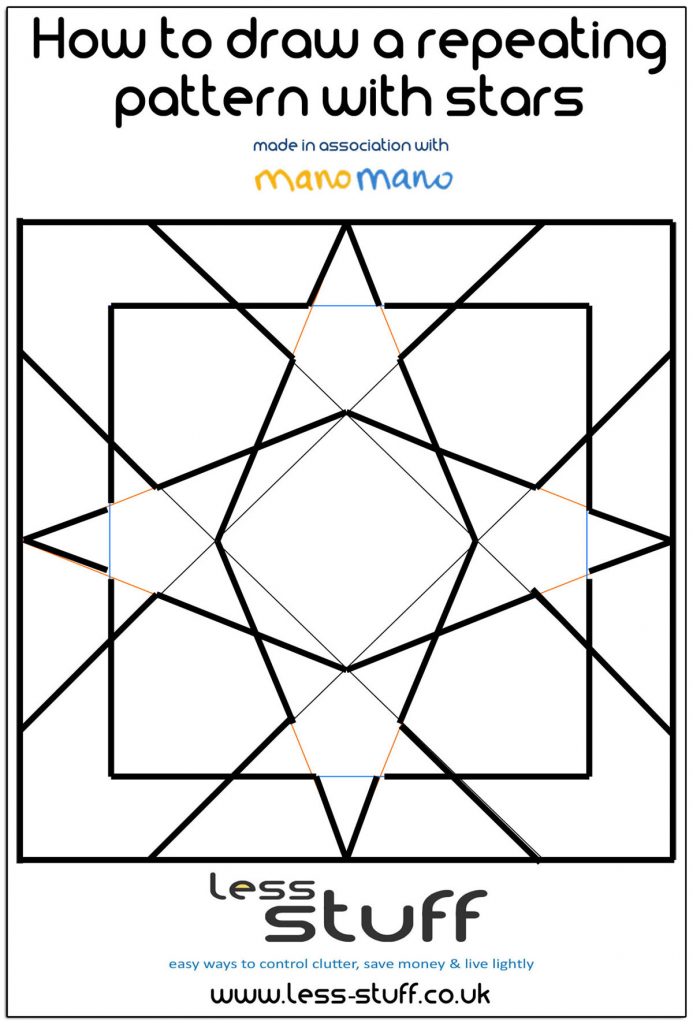
I have a free PDF of this pattern if you need it – just click here to download.
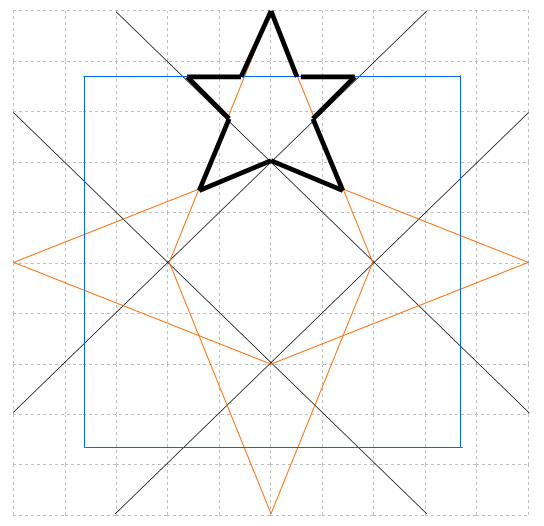
The Maths
This design works on a grid that is 10 x 10. I’ve drawn out the instructions to be as clear as I can make them. If the uneven star bothers you, then messing around with the width of the initial diagonal lines and the depth of the inner square will sort it out. If you do sort out the ratios, please let me know!
Before you mark up the wall, use the thin tape to make a border around the edge of the whole background. Use this to measure from and to mark on.
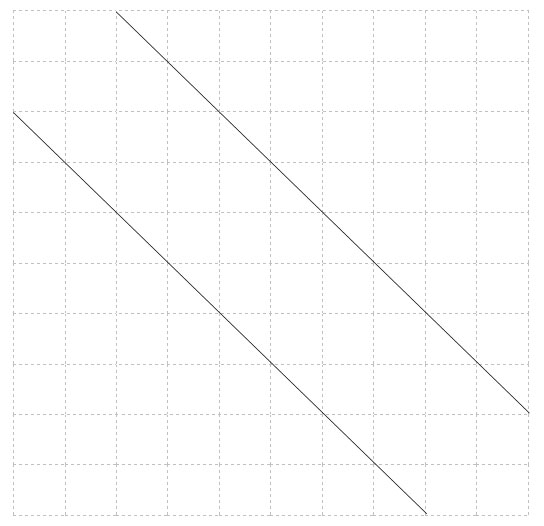
Start with lines 2/10ths in from corner

Copy on the other side
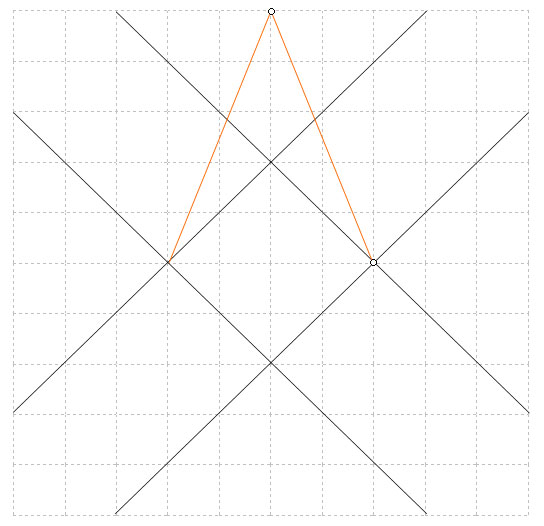
Draw from the corner of the central square to the middle
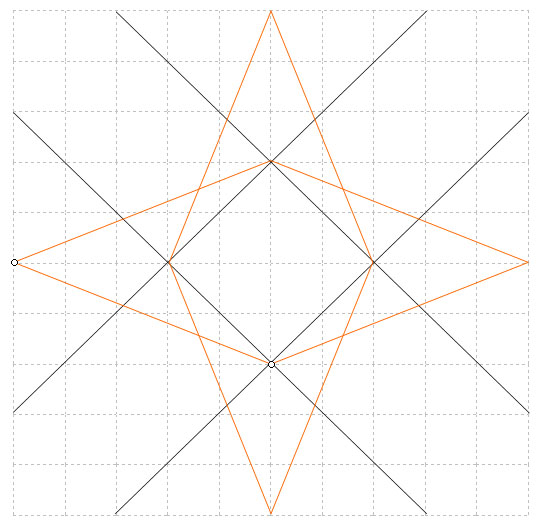
Repeat on all sides

The inner square goes between the 1/10 line and the 2/10 line
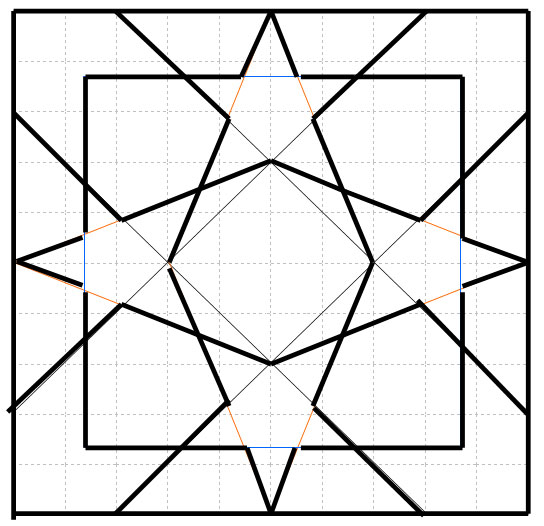
After taping, cut out the inside of the stars
Tape the pattern
Using the thinner masking tape, follow the edge of the pencil marks carefully. You can stretch the tape a little to get a straighter line. You will need to make a decision about being inside or outside the line, make sure you do the same thing everywhere. For that reason I suggest you tape in the same order that you drew the diagram on the wall.
Trim the tape
Really carefully, following the lines made by the tape, trim off the inside of the stars, the inside of the octagon at the centre and the corners of the inner square. It will make more sense when you start to do it.
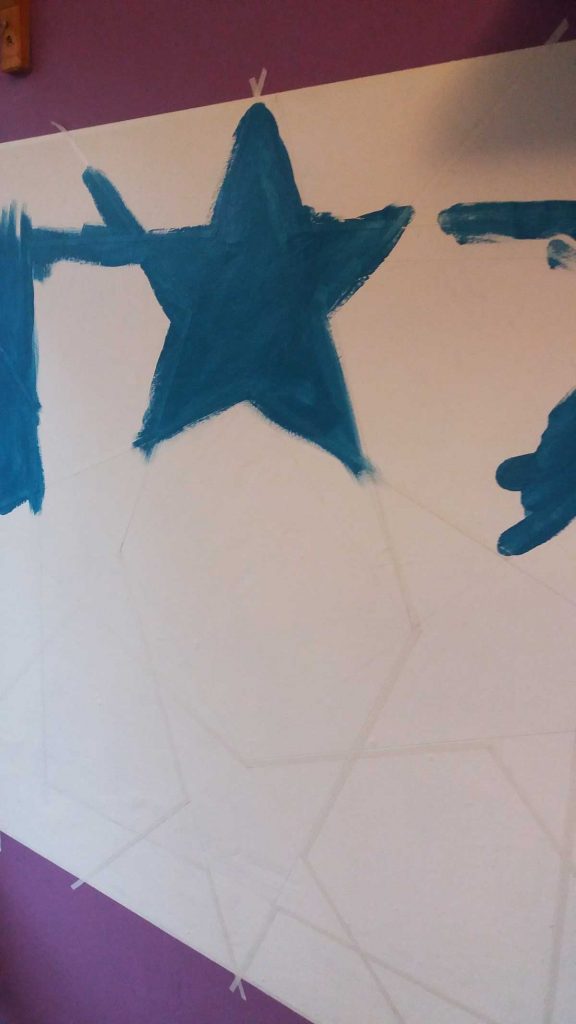
Get painting!
Masking tape is a weird mix of sturdy and delicate. Stir your paint before you use it and try to stroke it on in the direction of the tape, you want to avoid going under it. I used 3 coats of chalkboard paint with at least 6 hours drying time in between.
Let it dry properly!
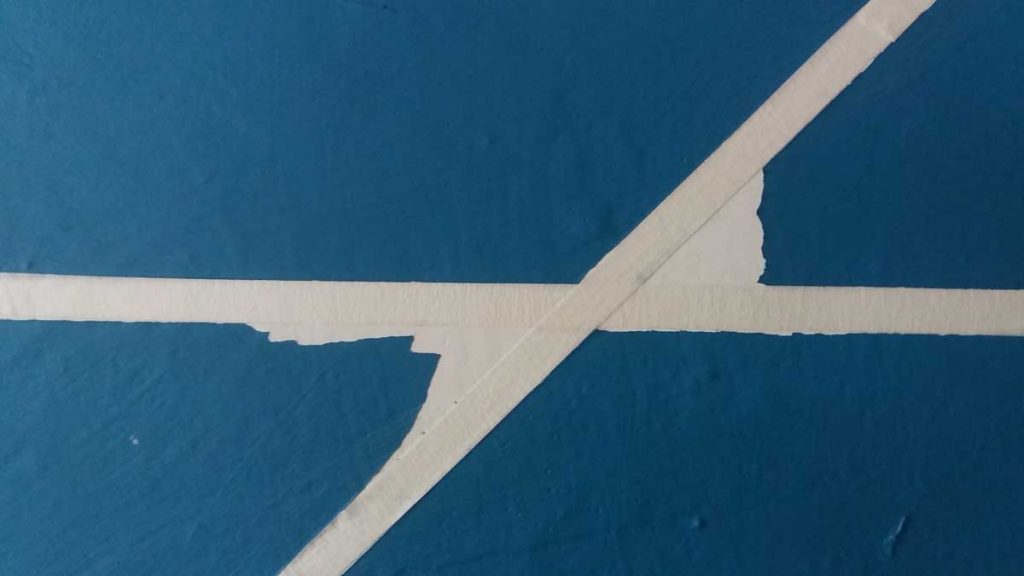
This was torture! I had to leave the house because the temptation to see what was under was huge! Peel off the tape slowly and gently.
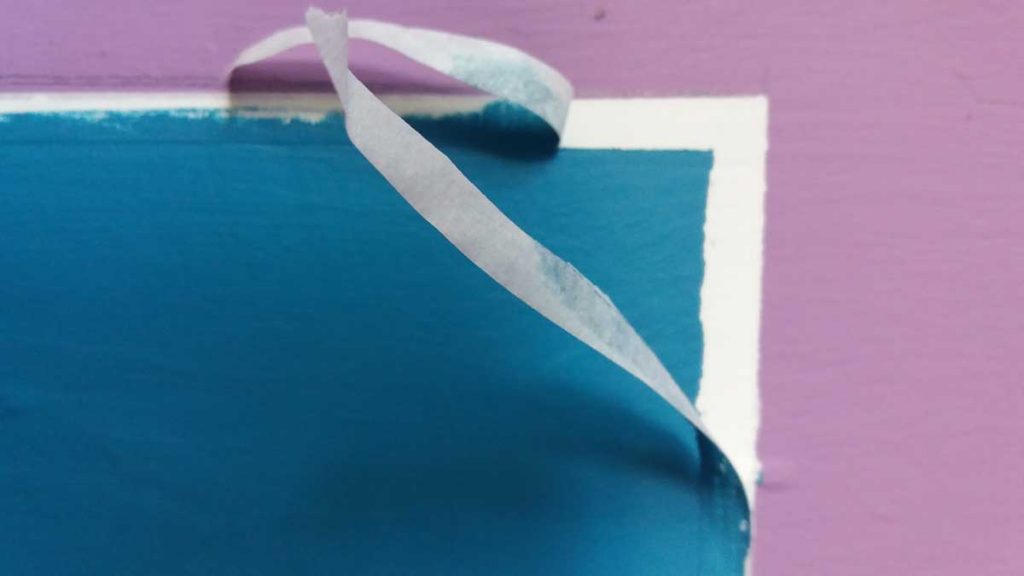
If your paint peels at all it is easy to fix by slicing off the peeling paint (don’t peel it any more!) and re-taping. Paint gently over it for a few coats and you won’t notice it when it is dry.
retape any areas that peeled off
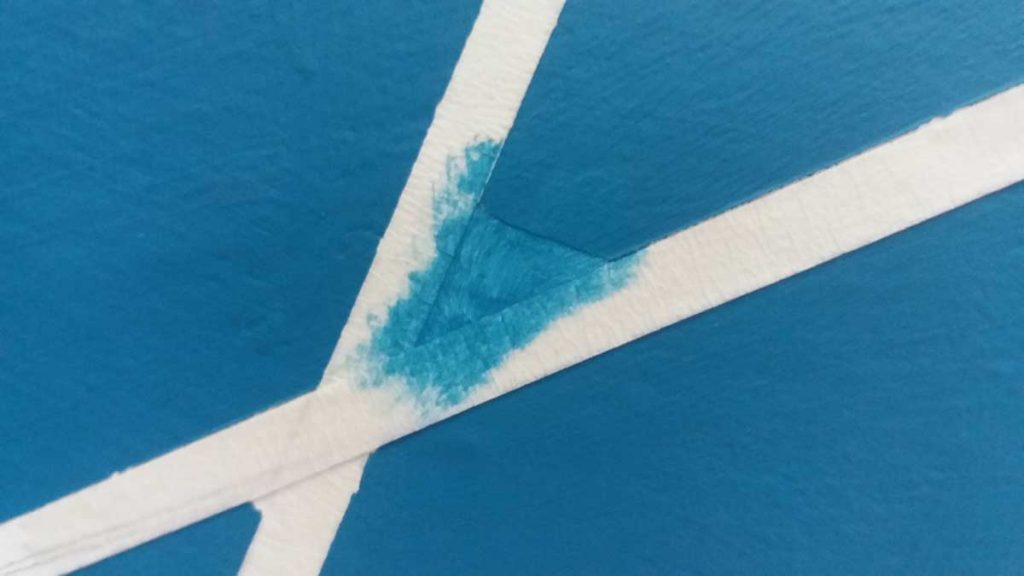
and dab on paint for a few coats
What type of chalk is best?
Use a permanent chalk pen for the things that will not be rubbed out. I’ve used a liquid chalk pen for the days of the week and the months. Normal kids chalk is fine for writing anything you want to wipe off. Wipe it off gently with a damp cloth and let it dry.
Disclosure – I bought the paint and loved it so much I asked ManoMano if they would sponsor a post. Please make it worth their while by visiting their store – it is well worth signing up for their newsletter too if you have any DIY interests. All the links to ManoMano products in this post are affiliate links so if you buy through them I’ll get a little commission.
If you are interested in sponsoring a post on www.less-stuff.co.uk please check out my Media Pack for info and drop me a note.